[graphicport]
Table of Contents
Making IoT Devices using an ESP8266 and Lua
What you need to start
Please note, I do not make any commission from you buying anything linked here.
- Development Board
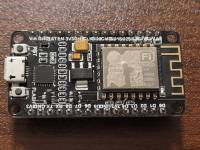
- [available here] ESP8266 NodeMCU development board
- [available here] Breadboard Jumper Wires
- Sensor module (these are the kinds I am using in my examples)
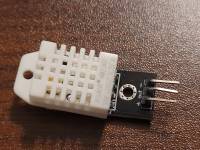
- [available here] DHT22/AM2302 Digital Temperature And Humidity Sensor Module
- [example here] Magnetic contact sensors
- [available here] One Channel Relay Module Relay Switch with OPTO Isolation High Low-Level Trigger
- [available here] 801S Vibration Sensor Module
- Software (My examples are all using Windows)
- [available here] Notepad++
- [build here] [prebuilt firmware] Firmware for NodeMCU with modules: dht, file, gpio, http, node, tmr, uart, wifi
- [available here] ESP8266 Windows Drivers
- [copy available here] [source: github] ESP8266 Flasher
- [copy available here] [source: sourceforge] Asmodat ESP LUA Loader v1.1
Helpful Infomation:
Getting Started
I have included links to the source files for each piece of software needed, as well as copies that are held on my server. I did this so that if any of the links no longer work, the files are still available.
Flash the firmware
Install the drivers
The first time you plug in the ESP8266, you will need to install the correct drivers. What you need is the P210x Universal Windows Driver from here.
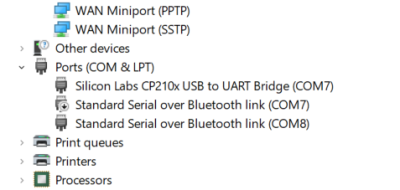
Note the name of the drivers: P210x Universal Windows Driver. This is important because you will need to go into the device manager, look for the Ports (COM & LTP), and find the Silicon Labs CP210x USB to UART Bridge device. Here you will be able to find the COM Port being used by the development board.
I have noticed with my upgrade to Windows 11 that my connection to the ESP8266 stopped working. Turns out there was a com conflict and I had to disable the other device using that com port.
Build the firmware
The first thing that needs to be done is to flash the firmware onto the ESP8266 development board. To do this, we need to have the firmware file! Above I have linked to a pre-built firmware that I am using for these examples as well as a link to the nodemcu build website that allows you to custom build your own firmware. If you choose to make your own, include the following modules: dht, file, gpio, http, node, tmr, uart, wifi.
My firmware file that I am using is named nodemcu-release-9-modules-2021-02-20-02-00-01-float.bin. You will notice that once you have completed a build, you are given the option of a float or integer file. What is the difference, you may ask?
- Float firmware: This firmware allows for more precision of numerical values. Dividing 3 by 2 will result in 1.5. This firmware is slower due to the higher precision.
- Integer firmware: This firmware is considered to be almost 8 times faster at executing than that of the float. This is because of less precision. Dividing 3 by 2 will result in 1; the decimal is truncated.
I am using the float firmware since I am using temperature sensors and will not be doing much that requires a lot of processing power.
Download the ESP8266 Flasher tool
This is where we need to use the ESP8266 Flasher tool. The only time you should need to use this tool is for flashing a brand new board, upgrading the firmware, or if your device is stuck in an infinite loop.
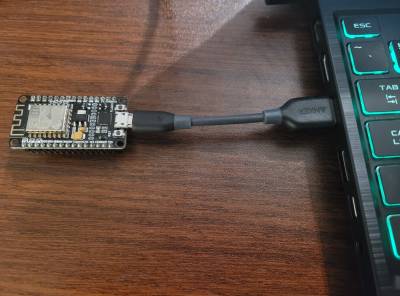
The ESP8266 board has a micro USB port that you use to connect to the computer. Connect the board directly to your computer.
Installation is minimal, simply download the tool and place it into a folder of your choice. Organization can really save time, so put it in a place that makes sense to you.
Run the tool. You need to know a few things that we've already covered above:
- Port that the ESP8266 is connected to
- Where your firmware is saved
Flash the firmware using ESP8266 Flasher tool
Steps for flashing the firmware:
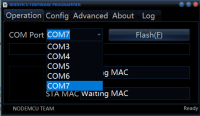
- On the first tab titled Operation, select the COM Port that the board is using. In my case, it is COM 7.
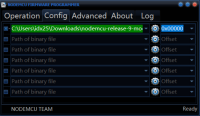
- On the second tab titled Config, select the gear icon for the first row and select the location of your built firmware.
- You should not have to change anything on the advanced tab.
- Return to the Operation Tab, and click Flash(F).
That's it. Just wait for the flash tool to finish, and your board should be ready to go. The next time the board boots, it will run an initilization. So after you have flashed the board, it is best to unplug it, then plug it back in. This way it is truely ready to go when you start adding your code.
Programming the ESP8266
Here I provide working code examples and some explanations of how things work. I recommend starting with the Lua file basics and Simple Lua program since the other sections build off the basics.
With these examples, you should be able to make your own code to achieve the goals you have.
Lua file basics
Lua files are very basic. They are nothing more than text files with the .lua extension. You can use anything to edit them, but I recommend Notepad++ because it has Lua as a supported language option that will help with your syntax.
The most important thing to know is that once you've flashed your development board and completed the initialization, the board will first look for the init.lua file. This is the initial file that starts your program.
You have to be careful not to cause an endless loop or it will be more difficult to work with the development board. If the board experiences an error, it is possible that the board will reboot, and then error again, endlessly. To fix this, you will need to reflash the firmware again. I recommend setting your code in a function and manually calling that function during testing and development. This way, the board will not get stuck in any error loops.
All of this will be included in the Simple Lua program.
Lastly, if you need to know more about the Lua NodeMCU programming commands, you can view that info [here]
Sample Files
- [view here] Simple Lua program
- [view here] HTTP page server programming
- [view here] Temperature Sensor programmming
- [view here] Mailbox or water sensor: Contact Sensor programmming
- [view here] Detect dryer cycle: Vibration Sensor programmming
- [view here] Open garage door: Relay Sensor programmming
![[graphicport]](/lib/exe/fetch.php/logo.png)
